
That gray, cracked concrete slab staring back at you in the basement, garage, or patio? It doesn’t have to stay boring. With a few supplies, a weekend, and a little patience, you can transform it into a stenciled concrete floor that looks like high-end tile or custom artwork—without breaking the bank.
DIY concrete floor stenciling is one of the most popular budget-friendly concrete floor makeovers sweeping US homes right now. Whether you’re decorating a basement hangout, upgrading a garage workshop, refreshing a sunroom, or giving a concrete patio new life, stenciling lets you achieve bold, colorful patterns that rival professional installations at a fraction of the cost.
The best part? You don’t need special training. This guide walks you through everything from cleaning and priming to sealing your finished design. By the end, you’ll know exactly how to stencil a concrete floor step by step—and feel confident doing it yourself.
Why Choose a Stenciled Concrete Floor?
Let’s talk numbers for a second. Installing ceramic tile or hardwood over concrete typically runs $8–$15 per square foot once you factor in materials and labor. A concrete floor transformation DIY project using stencils? Usually $2–$5 per square foot for materials alone. That’s a massive difference for a 200-square-foot basement.
Compared to other affordable decorative concrete options, stenciling holds its own beautifully:
- Stamped concrete requires professional equipment and runs $12–$25 per square foot.
- Epoxy flooring is durable but limits you to solid colors or flake finishes.
- Acid-stained concrete offers subtle, earthy tones but can’t produce crisp patterns.
Stenciling gives you the design flexibility of tile—the Moroccan tile stencil floor look, sharp geometric concrete floor patterns, or faux tile concrete floor designs—painted right onto your existing slab. No demolition. No heavy equipment.
Across the US, concrete floor design trends are leaning heavily into personalized, artisan-looking floors. Homeowners and small business owners alike are gravitating toward colorful concrete floor designs that feel custom without the custom price tag. It’s an easy concrete floor upgrade that delivers serious visual impact.
Tools and Materials You’ll Need
Before you start, gather your supplies. Most items are available at Home Depot, Lowe’s, or online stencil retailers like Cutting Edge Stencils or Royal Design Studio.
Essential supplies:
- Large-format reusable concrete floor stencil patterns (mylar or PET plastic, 12″×12″ or larger)
- Stencil paint for concrete floors (acrylic latex floor paint, epoxy-based paint, or specialty concrete paint)
- Concrete primer for stenciling (bonding primer compatible with your topcoat)
- Concrete sealer for stenciled designs (water-based polyurethane or acrylic, matte/satin/gloss)
- 4-inch foam roller, stencil brushes (round or flat), and a small foam dabber
- Painter’s tape, measuring tape, chalk line, and a level
- Cleaning supplies: degreaser, TSP (trisodium phosphate), stiff scrub brush, shop vacuum
- Concrete patching compound for cracks or chips
Optional but recommended:
- Anti-slip sand additive for the sealer (creates a non-slip stenciled concrete floor)
- Spray adhesive (repositionable) to hold stencils in place
- Cardboard or scrap plywood for practice runs
Rough cost estimate: For a typical 10×10 ft area, expect to spend $120–$250 total, depending on paint quality and stencil complexity. That’s a fraction of what tile or professional decorative concrete would cost.
Step 1: Assess and Prepare Your Concrete Surface
Here’s the truth: how to prepare concrete for stenciling matters more than any other step. Skip proper prep, and your paint will peel, bubble, or fade within a year.
Inspect first. Walk the floor and look for:
- Cracks wider than 1/8 inch
- Flaking or peeling previous coatings (old paint, sealer, epoxy)
- Moisture issues (dark patches, efflorescence—a white powdery residue)
- Grease or oil stains (common in garages)
If moisture is a concern, tape a 2×2 ft square of plastic sheeting to the floor for 24 hours. Condensation underneath means you’ll need a moisture-blocking primer before proceeding.
Clean thoroughly. This is concrete floor cleaning before stenciling done right:
- Sweep and vacuum all dust and debris.
- Apply a degreaser to oil spots; scrub with a stiff brush.
- Mix TSP with warm water (follow package directions) and scrub the entire floor.
- Rinse with clean water and let dry completely—24 to 48 hours in most climates.
Repair damage. Fill cracks and holes with concrete patching compound. Smooth with a putty knife, let cure per the product instructions, then sand lightly.
Etch if needed. If your concrete is very smooth or previously sealed, the paint won’t grip. Use a concrete etching solution (muriatic acid-based or citric acid-based, available at Home Depot) or lightly sand with 80-grit diamond sanding pads. Rinse and dry fully.
Proper prep ensures your vibrant patterned concrete floor actually stays vibrant for years.
Step 2: Prime the Concrete for Stenciling
Primer isn’t optional—it’s the bridge between porous concrete and your paint. A good concrete primer for stenciling seals the surface, improves adhesion, and makes your stencil colors pop with fewer coats.
Choosing primer: Match it to your paint type. If you’re using acrylic latex floor paint, go with a water-based bonding primer (Zinsser Bullseye 1-2-3 and Kilz Concrete & Masonry Bonding Primer are popular US options). For epoxy-based paints, use the manufacturer’s recommended epoxy primer.
Application tips:
- Stir the primer well; apply a thin, even coat with a 3/8-inch nap roller.
- Work in 4×4 ft sections to avoid lap marks.
- Let it dry 4–6 hours (check the label) before applying a second coat if needed.
- Ensure good ventilation—open windows and run fans, especially in basements or garages.
Pro Tip: If you’re painting a bold, dark stencil color over light concrete, ask the paint counter to tint your primer toward your topcoat shade. This cuts a full paint coat off your project.
Step 3: Choose Your Pattern and Layout
This is where your indoor concrete floor design (or outdoor concrete patio stenciling) vision comes to life.
Popular vibrant pattern options:
- Moroccan and Mediterranean tile stencils – intricate, repeating motifs in jewel tones; perfect for a faux tile concrete floor look
- Geometric and modern designs – bold hexagons, chevrons, or abstract shapes for a geometric concrete floor pattern
- Faux wood plank or herringbone – warm and rustic without actual wood
- Encaustic-inspired patterns – multi-color, vintage tile aesthetics
Choosing colors: For a truly vibrant result, pick a high-contrast palette. A crisp white or light gray base with deep navy, terracotta, emerald, or black stencil work creates drama. For colorful concrete floor designs, layer two or three accent colors within the stencil.
Planning the layout:
- Find the center of your room (measure and snap two perpendicular chalk lines).
- Dry-fit your stencil at the center to see how the pattern falls toward walls.
- Adjust so partial stencil repeats at the edges look balanced.
- Mark registration points with small pieces of painter’s tape for consistent repositioning.
In large spaces, work in a grid. Around obstacles like pipes or doorways, plan to trim the stencil or hand-paint small sections.
Step 4: Apply the Base Coat
Your base coat is the canvas. For most decorative concrete flooring ideas, a light neutral base (white, cream, light gray) lets the stencil pattern stand out and feel vibrant.
- Use the best paint for stenciling concrete—a high-quality acrylic latex floor paint or porch-and-floor enamel. Brands like Behr Porch & Patio, Valspar Concrete & Garage, or Rust-Oleum RockSolid work well.
- Apply with a 3/8-inch roller in thin, even coats. Two coats are standard for full, opaque coverage on concrete.
- Roll in one direction for the first coat; roll perpendicular for the second to eliminate streaks.
- Allow 6–8 hours drying between coats (longer in humid conditions).
Don’t rush this step. A streaky base will show through your stencil and dull the final look.
Step 5: Stenciling the Pattern
This is the heart of the project—stencil concrete floor step by step:
1. Secure the stencil. Tape it flat with painter’s tape on all edges, or use a light mist of repositionable spray adhesive. The stencil must lie perfectly flat to prevent paint from seeping underneath.
2. Load your tool correctly. Dip your foam roller or stencil brush into the paint, then off-load almost all of it onto a paper towel or cardboard scrap. You want a nearly dry tool. This is the single most important technique to avoid bleeding.
3. Apply paint in light layers. Dab or roll with very light pressure. Build color in two or three thin passes rather than one heavy coat. Thin layers dry faster, stay crisp, and look more vibrant once built up.
4. Lift carefully. Peel the stencil straight up—don’t slide it. You should see a clean, sharp pattern underneath.
5. Reposition using registration marks. Align the stencil’s built-in registration points (small cut-out shapes at the edges) with the previously stamped pattern. Tape down and repeat.
6. Work in sections. Start at the center and move outward toward walls. Work in rows so you can kneel on finished, dry sections without smudging wet paint.
Handling edges and obstacles: For corners, doorways, and tight spots, use a small stencil brush or fold the stencil gently to reach the area. Hand-paint tiny sections if needed.
Common mistakes to avoid:
- Too much paint on the roller → bleeding under the stencil (fix: let dry, sand lightly, re-stencil)
- Shifting stencil mid-application → doubled, blurry lines (fix: use more tape or adhesive)
- Misaligned repeats → pattern looks “off” (fix: step back and check registration marks every few placements)
Pro Tip: Always practice your technique on a large piece of cardboard or in a hidden corner first. Get a feel for how little paint you actually need before committing to the center of your floor.
Step 6: Touch-Ups and Custom Details
Once the full pattern is dry (wait at least 4 hours), inspect for small bleeds or gaps. Use a fine artist brush dipped in your base color to clean up tiny bleeds, or in your stencil color to fill small gaps.
This is also the moment to add personality:
- Hand-paint a contrasting border around the room’s perimeter.
- Layer a second, smaller stencil in an accent color for added depth.
- Add small dots, lines, or corner flourishes freehand for a truly custom feel.
These details elevate a DIY project from “painted floor” to “designed floor.”
Step 7: Seal and Protect Your Stenciled Floor
Sealing your stenciled concrete floor is non-negotiable—especially for a durable stenciled floor for high-traffic areas like garages, entryways, or patios. Without sealer, foot traffic, furniture, and moisture will wear your design down quickly.
Sealer options:
- Water-based polyurethane – low odor, easy cleanup, great for indoor floors. Matte or satin finishes hide imperfections; gloss adds depth.
- Acrylic concrete sealer – budget-friendly, good for patios and garages. Available at Home Depot and Lowe’s.
- Epoxy clear coat – maximum durability for garages or commercial spaces.
Application:
- Ensure the painted floor is fully cured (24–48 hours minimum).
- Apply sealer with a clean 3/8-inch roller in thin, even coats.
- Two coats minimum; three for high-traffic zones.
- Allow 4–6 hours between coats.
- Full cure before moving furniture back: typically 48–72 hours.
For a non-slip finish: Mix a fine silica sand additive into your final sealer coat, or choose a sealer labeled “textured” or “anti-slip.” This is especially smart for concrete patio stenciling or any area that gets wet.
Maintenance: Sweep or vacuum regularly. Mop with a pH-neutral cleaner. Avoid abrasive scrubbers and harsh chemicals like bleach or ammonia. Plan to re-seal every 3–5 years depending on traffic.
Cost, Time, and Difficulty: What to Expect
Timeline:
- Prep and cleaning: 3–5 hours (plus 24–48 hours drying)
- Priming: 2 hours (plus drying)
- Base coat: 2–3 hours (plus drying between coats)
- Stenciling: 6–12 hours for a 100–200 sq ft area (this is the labor-intensive part)
- Sealing: 2–3 hours (plus 48–72 hours cure)
Total project: roughly a weekend, spread across 3–5 days when you factor in drying times.
Estimated material costs (US):
- Small area (50–100 sq ft): $80–$150
- Medium room (150–250 sq ft): $150–$300
- Large area (300+ sq ft): $250–$500
Difficulty: Beginner-friendly. The technique is simple; the challenge is patience and consistency. If your space is over 400 sq ft or involves intricate multi-color patterns, hiring a decorative concrete artist may be worth considering.
Design Ideas and Inspiration
Need a spark? Here are four decorative concrete flooring ideas readers love:
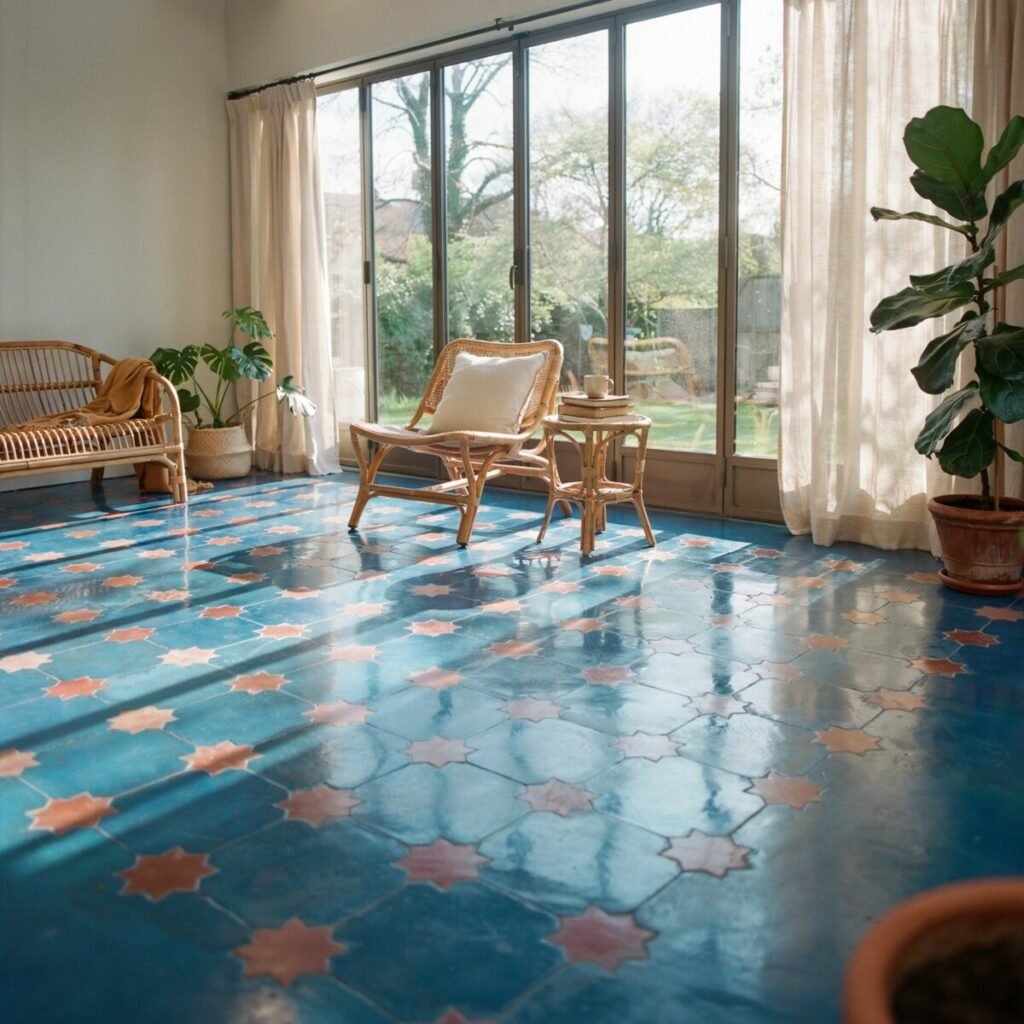
Bold Moroccan Tile Sunroom: A cream base with cobalt blue and terracotta Moroccan stencil motifs. Pair with rattan furniture and trailing plants for a relaxed, global vibe.
Geometric Black-and-White Basement: Crisp white base with matte black hexagon or chevron stencils. Instantly modern, perfect for a media room or home gym. Industrial or Scandinavian decor ties it together beautifully.
Colorful Boho Patio: A warm sand base stenciled with layered diamond and floral motifs in coral, teal, and mustard. Ideal for concrete patio stenciling in covered outdoor spaces.
Faux Encaustic Tile Kitchen/Laundry: Multi-color encaustic-inspired stencils in muted blues, grays, and whites create a faux tile concrete floor that looks like hand-painted European tile—perfect under a farmhouse sink or alongside open shelving.
A well-executed concrete floor before and after can genuinely boost perceived home value and make listings pop in photos.
FAQs About Stenciled Concrete Floors
How long does a stenciled concrete floor last?
With proper prep, quality paint, and two to three coats of sealer, expect 5–10 years in moderate-traffic areas. Re-sealing every few years extends the life significantly.
Can you stencil over old concrete?
Yes, as long as the surface is sound. Clean, repair cracks, and if old paint or sealer is present, scuff-sand or etch so new primer can bond. You can absolutely stencil over old concrete that’s structurally intact.
Is stenciled concrete slippery when wet?
It can be if sealed with a high-gloss product. Add a non-slip additive to your final sealer coat, or choose a textured sealer, especially for outdoor or garage applications.
How do you clean a stenciled concrete floor?
Sweep or vacuum, then mop with warm water and a pH-neutral floor cleaner. Avoid vinegar, bleach, or abrasive pads, which can degrade the sealer over time.
What’s the difference between stenciled and stamped concrete?
Stamped concrete is pressed into wet concrete with rubber mats during pouring—it’s a structural process. Stenciling is a surface-painting technique applied to existing cured concrete, making it far more DIY-accessible and budget-friendly.
Can I do this in a rental? Is it reversible?
Stenciling is semi-permanent. It can be covered with area rugs or, eventually, painted over with a solid color. Check your lease first, but many renters do a stenciling concrete floor in basement or garage as a low-commitment upgrade.
Conclusion
A stenciled concrete floor is proof that you don’t need a contractor’s budget or a demolition crew to get a showstopping floor. With the right prep, a few quality products, and an afternoon of steady dabbing, you can go from bare gray slab to a vibrant patterned concrete floor that looks custom-made.
If you’re nervous, start small. Stencil a 4×4 ft section behind a door or inside a closet to build confidence. Once you see those crisp, colorful lines appear under the stencil, you’ll be hooked.
We’d love to see your concrete floor before and after photos! Drop your results, questions, or favorite stencil patterns in the comments below. Happy stenciling!