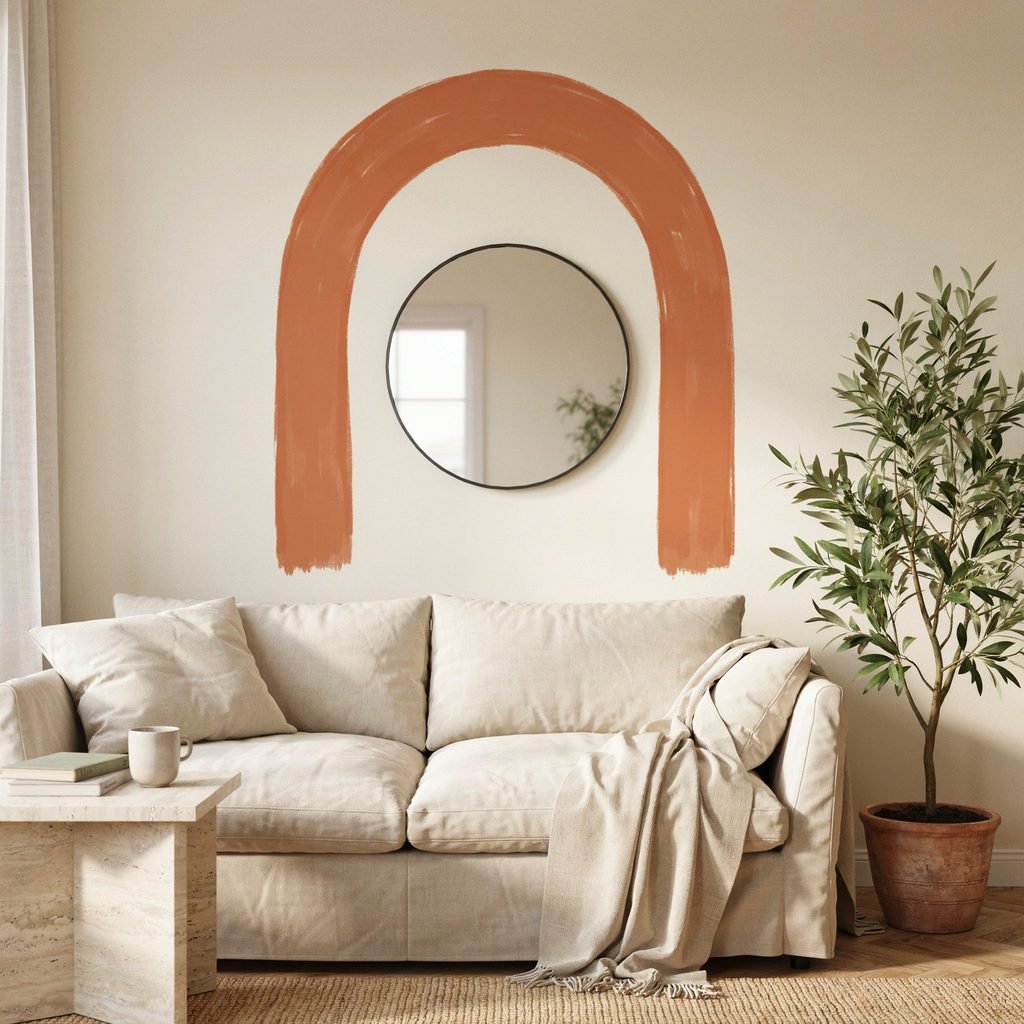
There’s a reason painted arches have taken over Instagram feeds, design blogs, and living rooms across the country. They deliver the visual drama of a architectural detail—color, depth, personality, a sculptural focal point—without a single demolition hammer, contractor invoice, or weekend spent wrestling with drywall. One can of paint, a roll of tape, and an afternoon can transform a blank stretch of wall into something that looks intentional, curated, and genuinely expensive.
Whether you’re refreshing a bedroom accent wall, adding character to a rental apartment, or looking for a budget-friendly home décor upgrade that doesn’t require landlord sign-off on construction, a DIY painted arch checks every box. It suits bedrooms, living rooms, nurseries, home offices, entryways, and small apartments alike. And if you’re renting, removable paint options or a simple conversation with your landlord can make this modern wall décor trick completely accessible.
Let’s walk through everything you need to know—from choosing the right curve to styling the finished result—so you can tackle this easy weekend DIY project with confidence.
What Is a Painted Wall Arch and Why Does It Work?
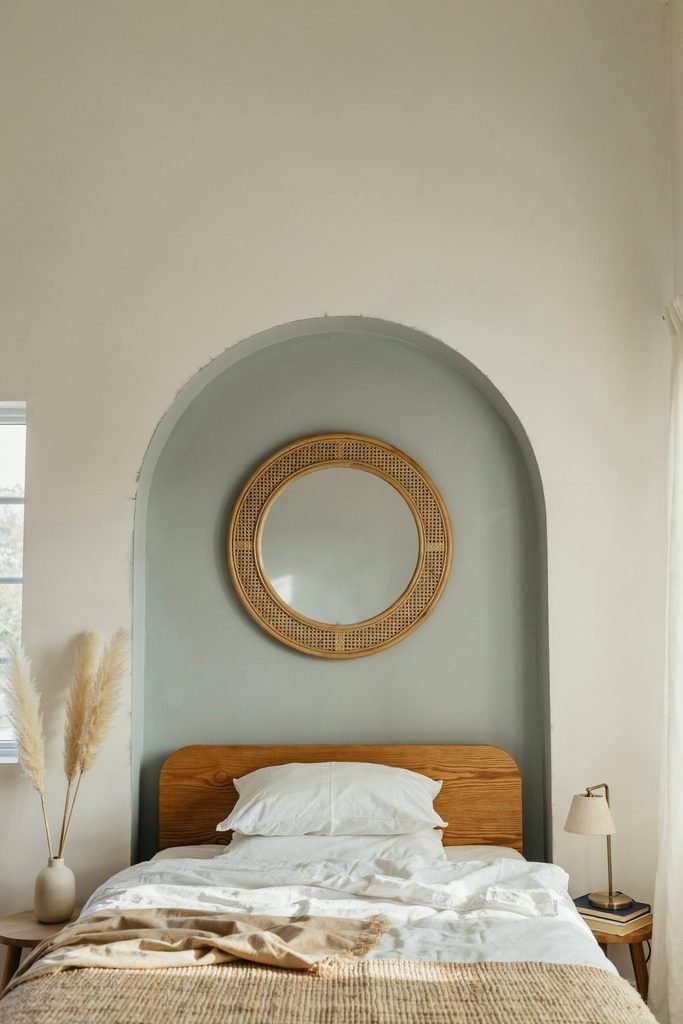
A painted wall arch is exactly what it sounds like: a solid or two-tone arch shape painted directly onto a flat wall. Unlike a true architectural arch built into plaster or drywall, this curved wall design is purely decorative. It creates the illusion of a recessed niche, a doorway, or a framed alcove, giving your eye a clear place to land.
As a decorative paint idea, it works because the human brain responds to curves. In a room full of rectangular furniture, square windows, and straight baseboards, a soft arch introduces contrast. It reads as intentional, architectural, and warm—modern interior design at its most approachable.
Benefits of a DIY Painted Arch
Before you pick up a brush, here’s why this project earns its hype:
- Low cost. A quart of interior paint, tape, and basic supplies typically run under $40. Compare that to wallpaper installation, built-in shelving, or any architectural renovation.
- Fully customizable. You choose the color, the width, the height, and the finish. Change your mind in a year? Paint over it.
- No special skills required. If you can measure a wall and roll paint, you can paint an arch on a wall.
- Visual impact. A well-placed arch makes ceilings feel taller, corners feel cozier, and a room feel more deliberate.
- Low commitment. Unlike tile, paneling, or structural changes, a painted accent wall reverses with one coat of your original wall color.
Best Locations for Painted Arches
Not sure where to start? These spots deliver maximum visual payoff:
- Behind a bed for a soft, enveloping bedroom accent wall
- Behind a sofa or console table in the living room
- Behind a desk as a home office paint idea that defines your workspace
- Around open shelving or a gallery wall to unify the display
- Behind a reading chair or bench in a small apartment
- Framing a plant display or entryway accent wall
- In a nursery as a gentle wall mural backdrop for a crib
The guiding principle: place the arch where it visually “frames” something you already own.
Materials and Tools You’ll Need
Gather everything before you start so the project flows smoothly:
- Interior wall paint (one quart is usually enough for a single arch)
- Primer, if painting over a dark color or bare drywall
- Painter’s tape (high-quality, sharp-edge variety)
- Pencil and eraser
- Measuring tape
- Level (a 24-inch level works well)
- String (about 3 feet) and a pushpin or thumbtack
- Large piece of cardboard OR a large round object (trash can lid, exercise ball, large mixing bowl)
- 2-inch angled paintbrush
- 4-inch mini foam roller
- Drop cloth or old sheet
- Small touch-up brush for cleanup
Total cost for supplies you don’t already own: roughly $25–$45, making this one of the most affordable room makeover projects available.
Choosing Paint Finish and Color Palette
Finish Matters
For a painted arch wall, a matte or eggshell finish is the most forgiving. Matte hides brush strokes and minor wall imperfections. Eggshell adds a whisper of sheen and wipes clean more easily—helpful in nurseries or entryways. Avoid high-gloss finishes unless the wall surface is perfectly smooth, because gloss amplifies every bump.
Color Ideas to Consider
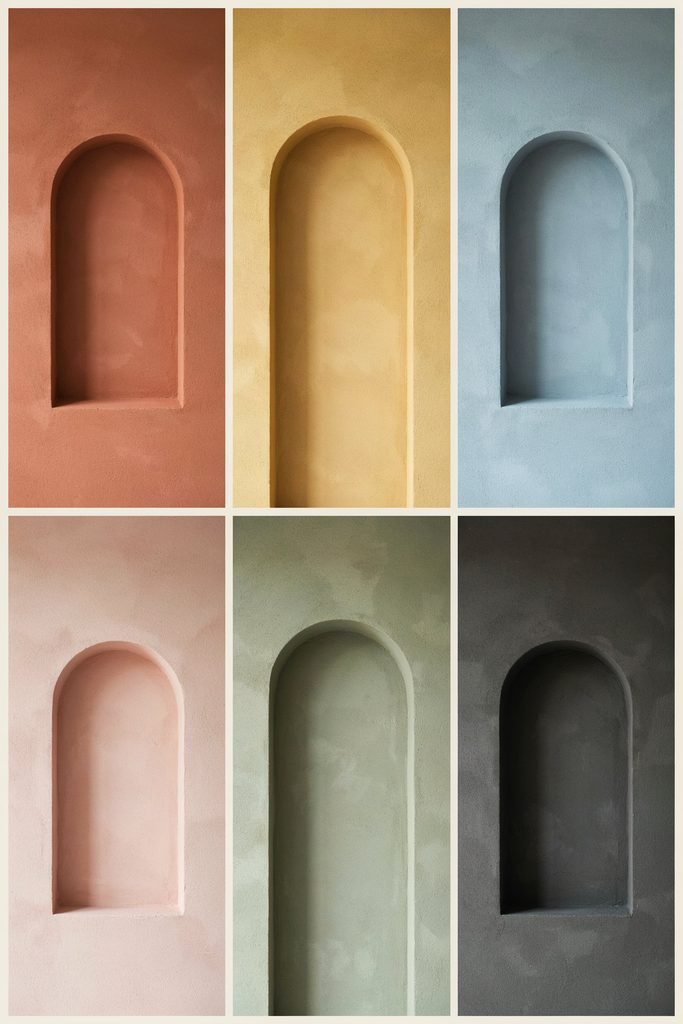
Paint color ideas for arches tend to lean warm, earthy, or softly saturated:
- Terracotta arch: Warm, Mediterranean, pairs beautifully with cream walls and rattan furniture.
- Sage green arch: Calming, organic, ideal for bedrooms and nurseries.
- Dusty blue arch: Serene and slightly vintage; lovely behind a desk or reading nook.
- Warm beige or greige arch: Subtle, tonal, perfect if you want texture without bold color.
- Blush pink arch: Soft, romantic, stunning behind a headboard.
- Charcoal arch: Moody and dramatic; frames light-colored artwork or mirrors beautifully.
- Mustard yellow arch: Energetic, retro, a statement wall idea for creative spaces.
- Two-tone painted arch: Paint the lower rectangle one color and the curved top another for a graphic, geometric wall paint effect.
When selecting interior paint colors, pull from existing elements in the room—throw pillows, a rug, a piece of art—so the arch feels connected rather than random.
Step-by-Step: How to Paint an Arch on a Wall
Step 1: Measure and Mark
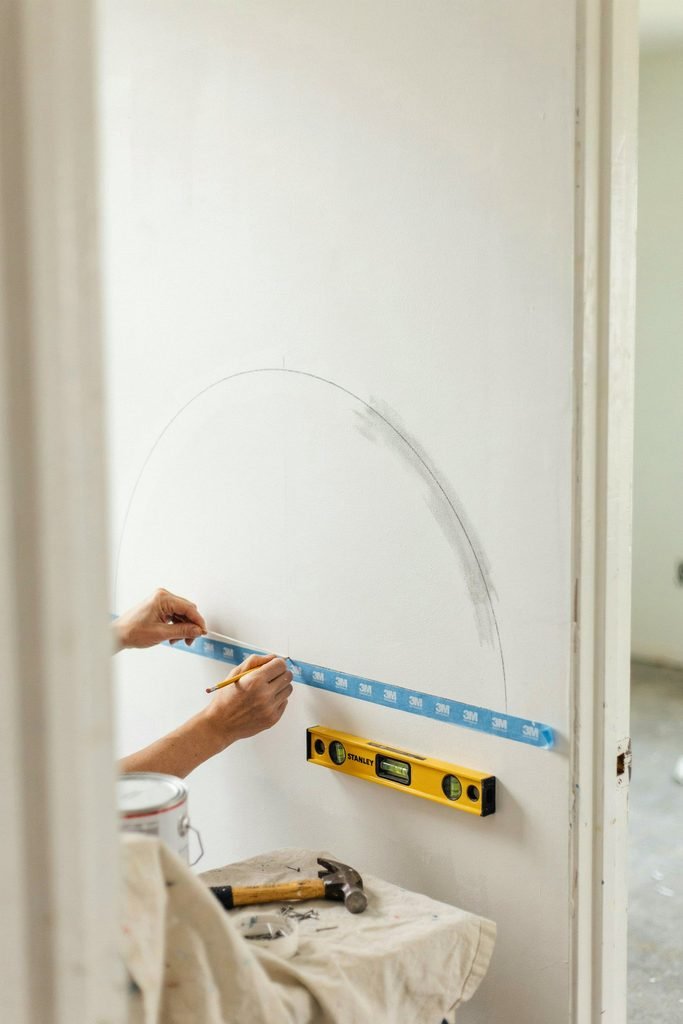
Decide on your arch width. A good rule: the arch should be at least 6–12 inches wider than the furniture beneath it on each side. Mark the center point of your wall space with a pencil. From that center, measure outward equally to mark the left and right vertical edges. Use your level to draw two perfectly plumb vertical lines from the floor (or from the top of your furniture) up to where the curve will begin.
Step 2: Create the Curve (Two Methods)
Method A – String and Pencil:
Push a thumbtack into the wall at the center point where the curve’s peak will be. Tie a loop of string around the pencil, then stretch the string to the tack. Keeping the string taut, swing the pencil in a smooth semicircle from the left vertical line to the right. Adjust string length until the curve’s width matches your arch. This gives you a perfect, symmetrical arc.
Method B – Cardboard Template or Round Object:
Trace the curve of a large round object—a trash can lid, an exercise ball, or a big serving bowl—onto cardboard. Cut out the semicircle. Tape the template to the wall at the correct height, centered between your vertical lines, and trace around it with a pencil. Alternatively, press the round object directly against the wall and trace.
Step 3: Tape the Edges
Once your pencil lines are finalized, run painter’s tape along the outside of every line. Press the tape down firmly, especially along the curve. Use short strips for the curved section so the tape bends smoothly without wrinkling.
Step 4: Prime (If Needed)
If your wall is dark, heavily textured, or unpainted drywall, apply one coat of primer inside the taped arch area. Let it dry fully.
Step 5: Paint
Using your angled brush, “cut in” along the taped edges first, painting away from the tape. Then fill the interior with the mini roller in smooth, even strokes. Apply two coats for full, even coverage, letting the first coat dry according to the paint can’s instructions.
Step 6: Remove Tape and Touch Up
Peel the tape while the final coat is still slightly tacky—pull at a 45-degree angle away from the painted area. Use a small touch-up brush and your original wall color to fix any tiny bleeds.
Getting Arch Proportions Right
Proportion is where most first-time projects go sideways. Keep these guidelines in mind:
- Width: At least 6 inches wider than the furniture on each side. A queen headboard (60 inches) pairs well with an arch 72–84 inches wide.
- Height: The arch’s peak should sit 6–18 inches above the tallest point of the furniture below it. For a desk, that might be 12 inches above the monitor.
- Vertical start: The straight sides of the arch can begin at the floor for full drama, or at the top of the furniture for a floating, framed look.
- Ceiling clearance: Leave at least 12–18 inches of bare wall between the arch peak and the ceiling so the shape doesn’t feel cramped.
Painting Crisp Edges: Painter’s Tape Tips
Nothing elevates a painted arch like razor-sharp lines. Here are painter’s tape tips that make the difference:
- Press tape edges down with a fingernail, a putty knife, or the back of a spoon.
- Paint a thin coat of the existing wall color over the tape edge first. Once dry, apply your arch color. Any bleed will be the wall color, making it invisible.
- Remove tape before the paint is fully cured—tacky, not wet.
- Use a fresh blade to score along the tape edge before peeling if the paint has dried completely.
Styling Ideas for Your Finished Arch
Once the paint is dry, styling turns the arch from a paint project into a designed moment:
- Hang a round mirror centered in the arch to echo the curve.
- Install floating shelves inside the arch for books, candles, or small plants.
- Add a pendant light or wall sconces at the arch’s peak for evening drama.
- Lean a framed print or gallery wall arrangement within the painted frame.
- Place a bench, accent chair, or bookcase directly beneath for grounding.
- Style with plants, woven baskets, or a stack of coffee-table books for layered, lived-in texture.
- In an entryway, pair the arch with a slim console table and a hook rail.
These interior decorating ideas work whether your style is minimalist, boho, traditional, or maximalist.
Room-Specific Inspiration
- Bedroom: A sage or blush arch behind the headboard creates a cocooning bedroom accent wall. Add matching pillow shams for cohesion.
- Living room: A terracotta or charcoal arch behind the sofa anchors seating and adds living room wall décor without a single frame.
- Home office: A dusty blue or warm beige arch behind your desk defines the workspace in a shared room—smart home office paint ideas for small spaces.
- Nursery: A soft mustard or two-tone arch behind the crib functions as a gentle nursery wall mural without committing to themed wallpaper.
- Entryway: A warm greige arch around a console and mirror gives guests an immediate focal point.
- Small apartments: A single arch in a studio can visually separate “sleeping” from “living” zones—excellent small space decorating strategy.
Budget-Friendly and Renter-Friendly Ideas
Not every situation calls for permanent paint. Here are workarounds:
- Removable or peel-and-stick paint: Some brands offer paint formulated to peel off cleanly. Test a small area first.
- Landlord approval: Many landlords approve a painted accent wall if you agree to repaint before move-out. Get approval in writing.
- Removable wallpaper arch: Cut an arch shape from peel-and-stick wallpaper for zero-paint impact.
- Painted arch on a large canvas or MDF board: Lean it against the wall for a renter-friendly wall idea that travels with you.
- Sample pots: Use $5 paint samples for a tiny arch behind a nightstand or shelf—affordable room makeover at its most accessible.
Common Mistakes and How to Fix Them
| Mistake | Fix |
|---|---|
| Uneven or wobbly curve | Lightly sand, repaint the edge, or widen the arch slightly to mask it. |
| Arch too small for the furniture | Extend the sides and curve outward with additional paint; blend carefully. |
| Paint bleeding under tape | Touch up with the wall color using a fine brush; use the “seal the tape” trick next time. |
| Patchy, streaky coverage | Apply a second (or third) coat; use a roller instead of a brush for large areas. |
| Wrong finish (too glossy) | Lightly scuff with 220-grit sandpaper and repaint in matte or eggshell. |
| Poor measurements / off-center arch | Use a level and re-mark before painting; if already painted, repaint the wall and start over. |
The beauty of this wall painting technique: mistakes are almost always fixable with a little extra paint and patience.
FAQ: DIY Painted Arches
Can beginners paint an arch on a wall?
Absolutely. If you can measure, tape, and roll paint, you have every skill needed. Start with a smaller arch behind a nightstand to build confidence.
Do you need painter’s tape for a painted arch?
Painter’s tape is strongly recommended for crisp edges, especially on the curved section. Very steady-handed painters can freehand the straight sides, but the curve benefits from taped guidance.
What kind of paint is best for a wall arch?
Standard interior latex or acrylic wall paint in a matte or eggshell finish works beautifully. No specialty paint is required.
How long does it take to paint a wall arch?
Plan for about 2–4 hours of active work, plus drying time between coats. Most people complete the project in one afternoon or a relaxed Saturday morning.
Can painted arches work in small rooms?
Yes. In small spaces, an arch draws the eye upward and creates a focal point that makes the room feel more designed and less boxy. Stick to lighter or mid-tone colors to keep the space feeling open.
Go Ahead—Paint the Arch
Here’s the honest truth: a DIY painted arch is one of those projects that looks far more complicated than it actually is. You don’t need a contractor. You don’t need power tools. You don’t need a design degree. You need a free Saturday, a color that makes you smile, and the willingness to measure twice before you paint once.
Pick your spot. Choose a shade that speaks to you—whether that’s a moody charcoal, a sun-washed terracotta, or a soft blush that makes your bedroom feel like a deep exhale. Tape your lines, swing your curve, roll on the paint, and step back.
That blank wall has been waiting for you to do something with it. An arch is the gentlest, most forgiving, most personality-packed something you can do. And the best part? If you ever want to change it, a fresh coat of white is all it takes.
Grab your roller. Your room’s about to get a whole lot more interesting.