There’s something almost magical about a fresh coat of paint. It’s one of the cheapest, most effective ways to breathe new life into any room — and the best part? You don’t need to be a professional painter or spend thousands of dollars to make it happen. Whether you’re a homeowner itching for a weekend project or a renter looking for creative ways to personalize your space without losing your security deposit, paint is your ultimate ally.
The truth is, even the smallest paint transformation can make a room feel modern, intentional, and uniquely yours. A bold accent wall, a painted headboard, or even color-blocked risers on a staircase can shift the entire mood of a space in just a few hours. And with so many budget-friendly DIY projects available, there’s truly no reason to settle for boring beige walls or dated furniture.
In this guide, we’re diving into 10 easy paint DIYs that deliver maximum visual impact with minimal effort. These beginner painting projects require no special skills, just a little creativity, some basic supplies, and the willingness to pick up a brush. Ready to give your home a fresh new look? Let’s get started.
1. Create a Bold or Neutral Accent Wall
What it is: An accent wall is a single wall painted in a different color from the rest of the room. It can be a deep, moody shade like navy or emerald, or a soft, calming neutral like warm taupe or sage green.
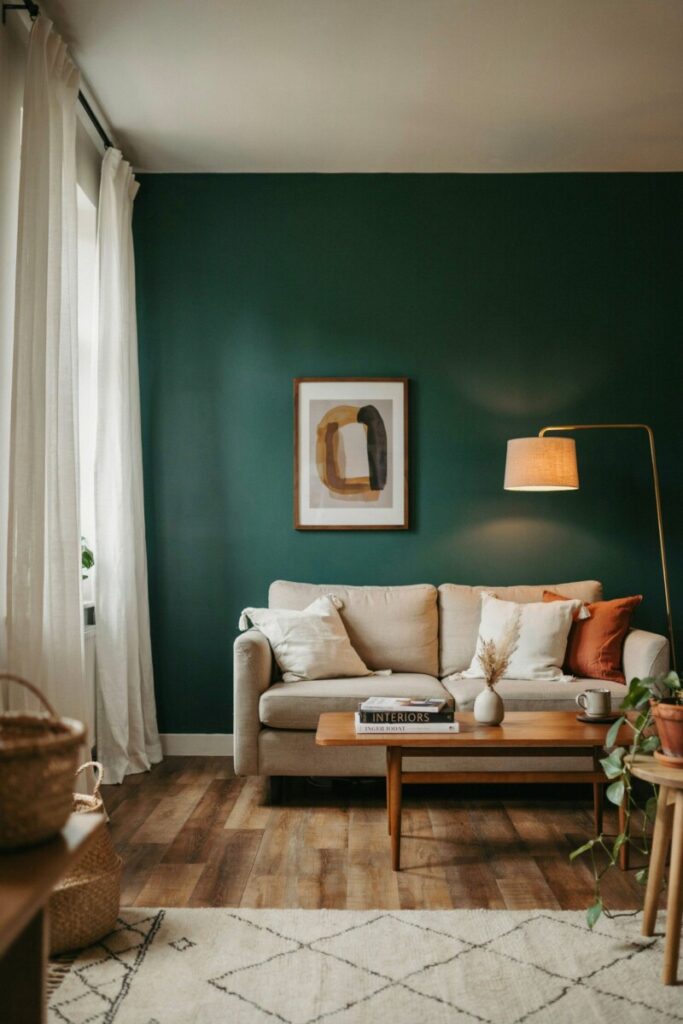
Why it works: An accent wall adds depth, drama, and visual interest without overwhelming a space. It draws the eye, creates a focal point, and instantly elevates the room’s design — making it one of the most popular wall paint ideas among interior designers and DIY enthusiasts alike.
How beginners can do it:
- Choose the wall that naturally serves as a focal point (behind the bed, sofa, or dining table).
- Apply painter’s tape along the edges where the wall meets the ceiling, trim, and adjacent walls.
- Roll on two coats of your chosen paint color, allowing proper drying time between coats.
- Remove the tape carefully while the final coat is still slightly tacky for crisp edges.
Materials needed: Paint (one gallon usually covers 350–400 sq ft), painter’s tape, drop cloths, a paint roller with extension pole, angled brush for cutting in, and a paint tray.
Design tips: For a sophisticated look, go one or two shades darker than the surrounding walls. If you’re renting, opt for a removable peel-and-stick accent as an alternative — or choose a color that coordinates with the existing neutral palette so future renters or buyers won’t mind.
2. Paint Your Doorway or Trim for Striking Contrast
What it is: Instead of painting your interior doors the same white as your trim, you paint them a contrasting color — think charcoal gray doors against bright white walls or a warm terracotta door in a cream-colored hallway.
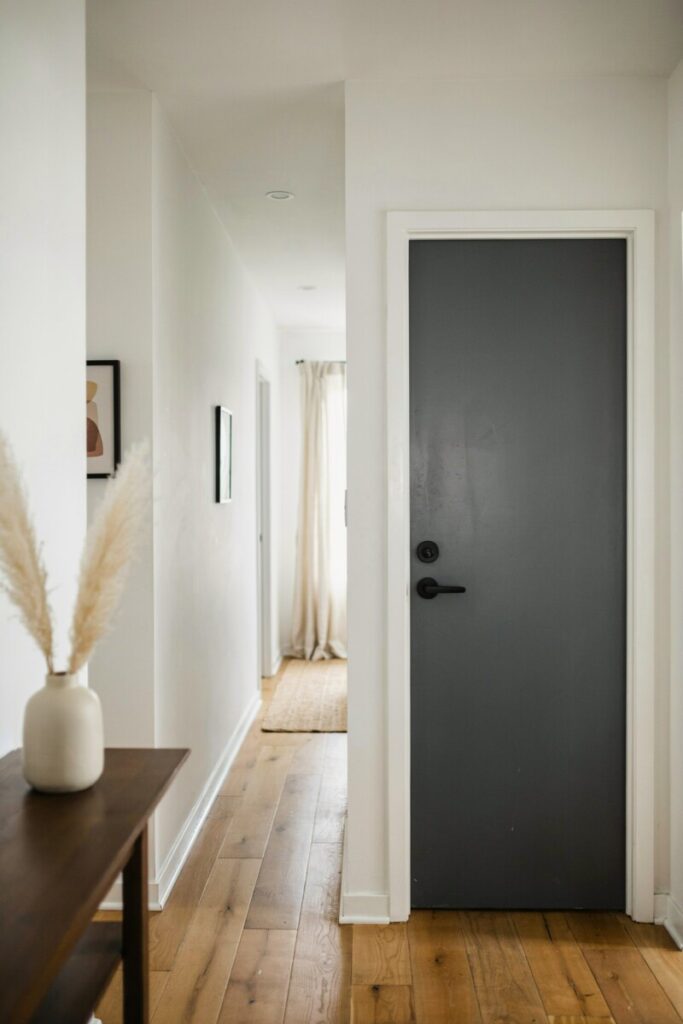
Why it works: This is one of those simple paint transformations that punches way above its weight in terms of impact. A painted door adds architectural interest, makes the space feel more curated, and costs almost nothing compared to replacing doors or adding molding.
How beginners can do it:
- Remove the door hardware (knob, lock, hinges) or tape them off carefully.
- Sand the door lightly with fine-grit sandpaper to help the paint adhere.
- Apply a coat of primer (especially important for previously stained or varnished doors).
- Paint with a high-quality semi-gloss or satin paint for durability.
- Reattach hardware once fully dry.
Materials needed: Semi-gloss or satin interior paint, primer, sandpaper (120–220 grit), paintbrush (2–2.5 inch angled), painter’s tape, and a screwdriver.
Design tips: Choose a color that complements your room’s palette. Dark doors work beautifully in light rooms, while a soft blush or muted green can add warmth to an all-white space. This project is also a fantastic renter-friendly DIY if you save the original hardware and can repaint before moving out.
3. Try a Color-Blocked Wall Design
What it is: Color blocking involves dividing a wall into geometric sections — rectangles, triangles, arches, or stripes — and painting each section a different color. It’s a modern, graphic approach to wall design that feels both artistic and intentional.
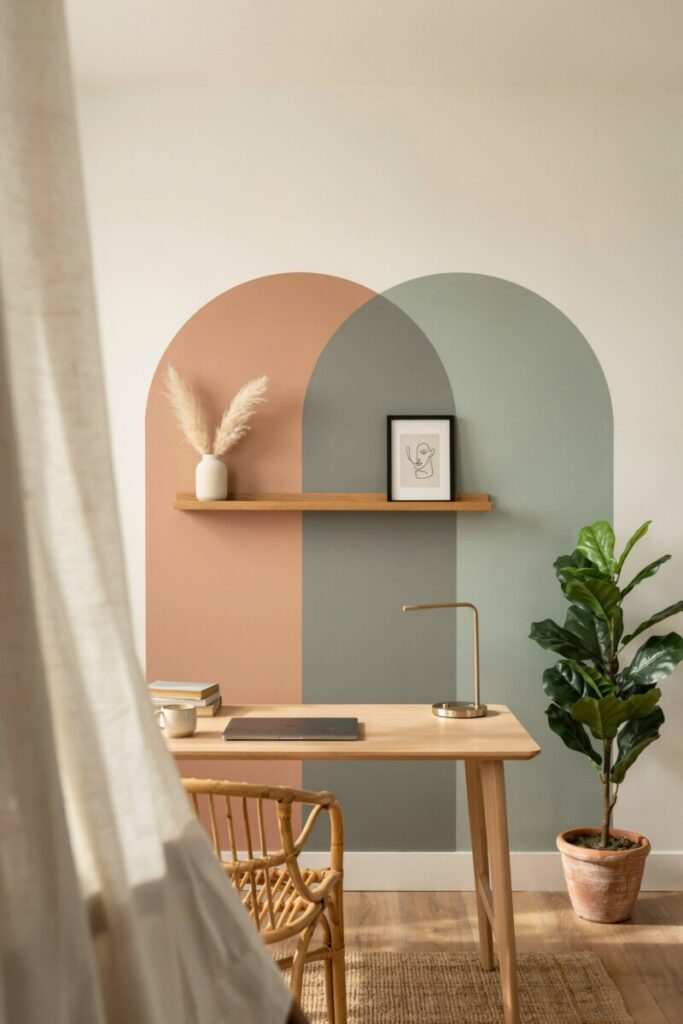
Why it works: This creative paint project turns a plain wall into a piece of art. It’s especially effective in small spaces like home offices, nurseries, or entryways where you want personality without clutter.
How beginners can do it:
- Sketch your design on paper first, including measurements.
- Use a level, measuring tape, and pencil to mark your design on the wall.
- Apply painter’s tape along all your marked lines.
- Paint each section, starting with the lightest color first.
- Remove tape while paint is still slightly wet for clean edges.
Materials needed: Multiple paint colors, painter’s tape (high-quality FrogTape or 3M blue tape works best), a level, measuring tape, paint rollers, angled brushes, and drop cloths.
Design tips: Stick to 2–4 colors that share a common undertone for a cohesive look. Soft pastels and earthy neutrals tend to photograph beautifully and age gracefully. For an easy wall design idea, start with a simple two-tone horizontal split or an oversized arch.
4. Give Old Furniture a Fresh Painted Makeover
What it is: This involves sanding and repainting an existing piece of furniture — a dresser, nightstand, bookshelf, or even a dated dining table — to give it a completely new look.
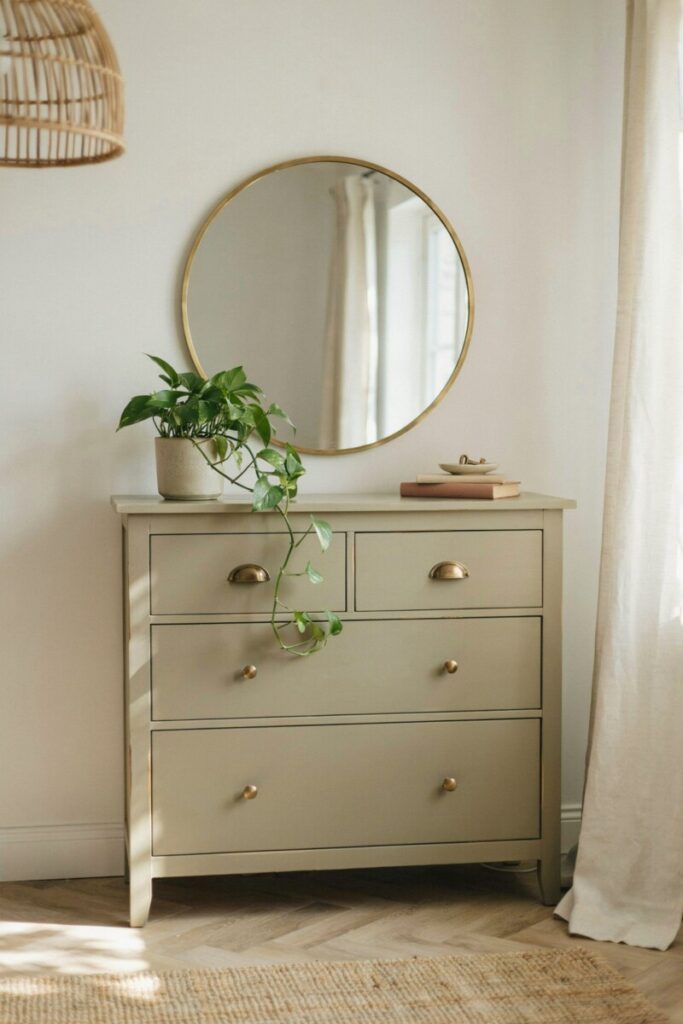
Why it works: Painted furniture ideas are among the most satisfying DIY painting projects because you can take something thrifted, inherited, or simply outdated and turn it into a statement piece. It’s sustainable, affordable, and lets you customize the color to match your aesthetic.
How beginners can do it:
- Clean the piece thoroughly and remove all hardware.
- Lightly sand the surface to create texture for paint adhesion.
- Apply a bonding primer if the surface is glossy or previously varnished.
- Paint with a brush or small roller using thin, even coats.
- Seal with a clear topcoat (polycrylic or wax) for durability.
- Reattach or replace the hardware.
Materials needed: Chalk paint or latex paint, primer, sandpaper, paintbrushes, clear topcoat (optional), and new hardware (optional).
Design tips: Chalk paint is incredibly beginner-friendly because it requires minimal prep and delivers a beautiful matte finish. For a modern look, go for crisp white, deep navy, or a muted olive green. Replace hardware with matte black, brass, or leather pulls for an extra upgrade.
5. DIY Stencil Wall Pattern
What it is: Using a wall stencil (available in countless patterns from Moroccan tiles to delicate florals), you paint a repeating design across an entire wall or a section of a wall.
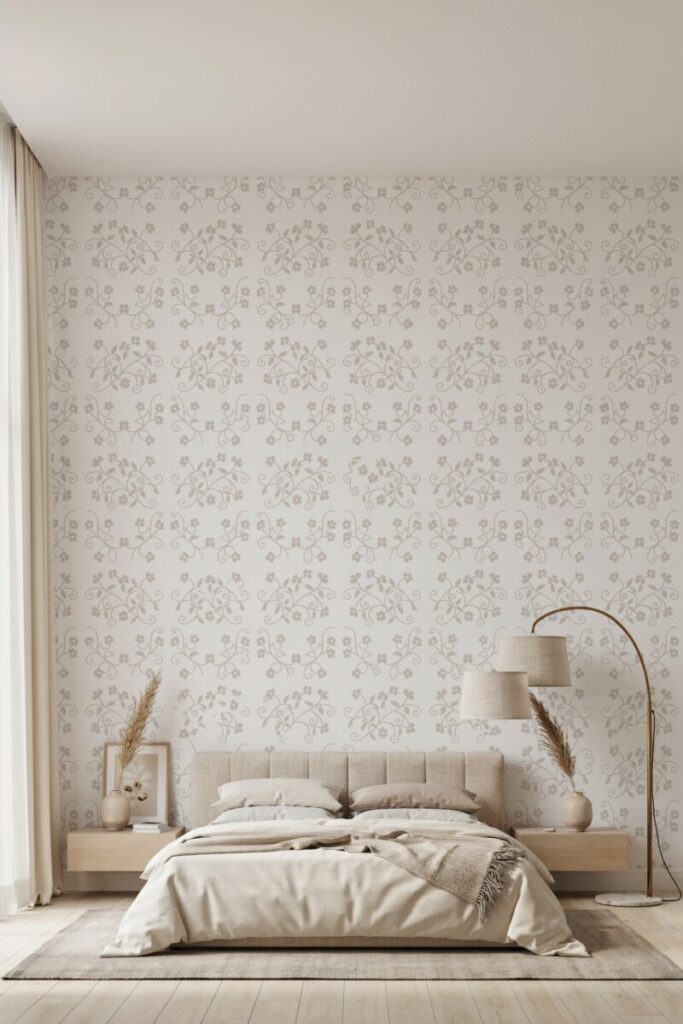
Why it works: A stenciled wall mimics the look of expensive wallpaper without the cost, permanence, or installation hassle. It adds texture, pattern, and personality — making it one of the most impressive easy home makeover ideas you can tackle in a weekend.
How beginners can do it:
- Choose a stencil pattern and paint color (or colors) that complement your room.
- Start from the center or a focal point and work outward.
- Secure the stencil with painter’s tape or spray adhesive.
- Use a stencil roller or dense foam brush to apply paint in a light, dabbing motion — don’t overload the brush.
- Realign the stencil using the registration marks and repeat.
Materials needed: Wall stencil, stencil brush or dense foam roller, paint, painter’s tape, a level, and a measuring tape.
Design tips: Use a single color that’s slightly lighter or darker than your wall color for a subtle, tone-on-tone effect. For bolder results, use contrasting colors. Practice on a piece of cardboard first to get your technique down before committing to the wall.
6. Paint a Headboard Illusion Directly on the Wall
What it is: Instead of buying or building a headboard, you paint a shape directly on the wall behind your bed — an arch, rectangle, half-circle, or even a scalloped design — in a coordinating color.
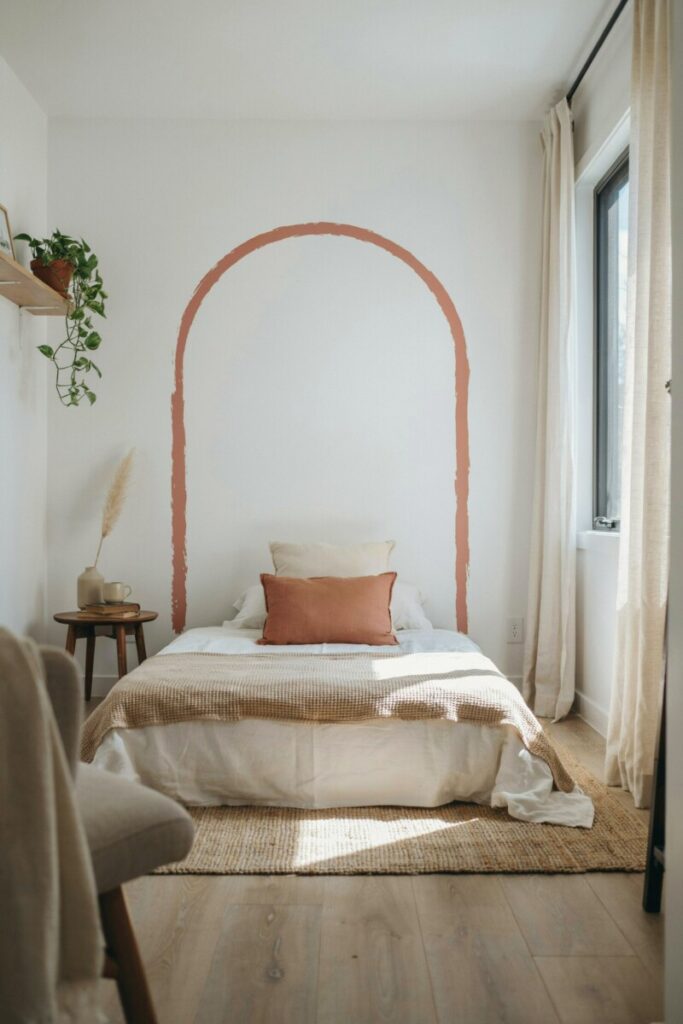
Why it works: This DIY room makeover trick creates the illusion of a custom, built-in headboard without the cost or bulk of actual furniture. It’s incredibly popular in small bedrooms, studio apartments, and guest rooms where space is at a premium.
How beginners can do it:
- Choose a shape and size that complements your bed frame and room proportions.
- Use painter’s tape, a level, and a string (for curves) to mark the design on the wall.
- Paint the shape with a roller and angled brush, applying two coats for full coverage.
- Remove tape carefully for clean edges.
Materials needed: Paint, painter’s tape, a level, string or compass (for curves), paint roller, angled brush, and drop cloths.
Design tips: Go bold with deep jewel tones in bedrooms, or keep it soft with blush, sage, or warm gray. Layer with floating shelves, wall sconces, or hanging art to create a complete vignette. This is one of those affordable home upgrades that looks incredibly high-end.
7. Freshen Up Kitchen or Bathroom Cabinets with Paint
What it is: Instead of replacing cabinets (which can cost thousands), you paint them for a completely refreshed look. This works for kitchen cabinets, bathroom vanities, laundry room storage, or built-in shelving.
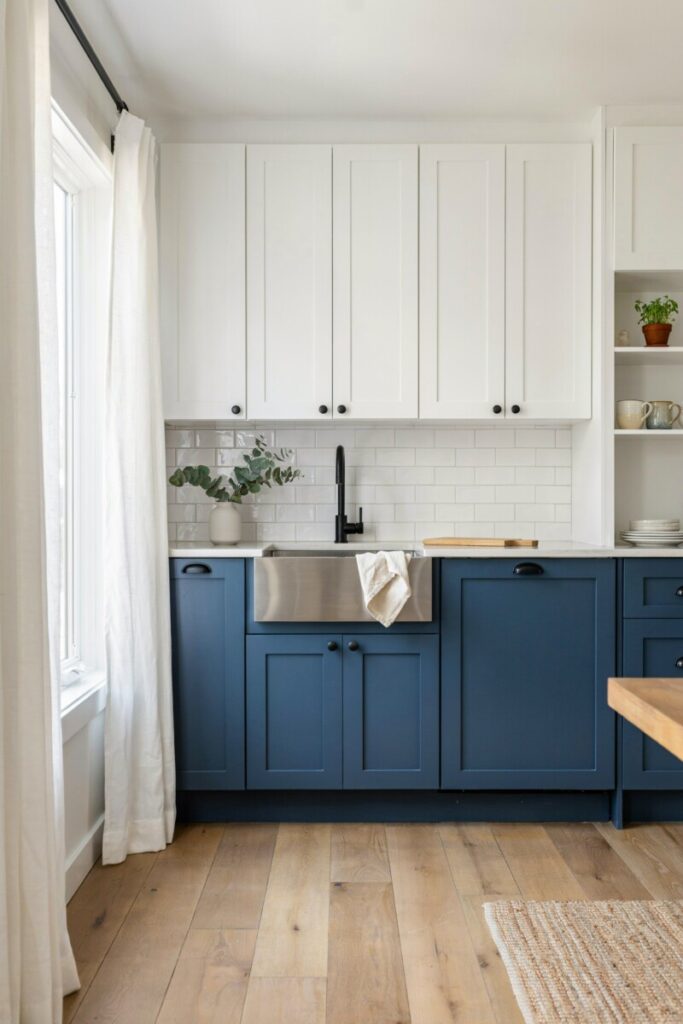
Why it works: Home improvement on a budget doesn’t get much better than this. A fresh coat of paint on cabinets can make an entire kitchen or bathroom feel brand new, and it’s one of the highest-ROI affordable home upgrades you can make.
How beginners can do it:
- Remove all cabinet doors, drawers, and hardware.
- Clean every surface with a degreaser (especially important in kitchens).
- Sand lightly and apply a high-adhesion primer.
- Paint with a semi-gloss or satin cabinet paint using a brush and small roller.
- Allow proper cure time (usually 24–48 hours) before reattaching.
- Update hardware for an even more dramatic transformation.
Materials needed: Cabinet paint (specialty paints like Benjamin Moore Advance or Sherwin-Williams ProClassic work well), degreaser, primer, sandpaper, brushes, small foam rollers, and new hardware (optional).
Design tips: White, navy, and sage green are timeless cabinet colors. For a two-tone kitchen, paint the lowers a bold color and keep the uppers white or light gray. Matte black hardware pairs beautifully with almost any cabinet color.
8. Paint Your Stair Risers for Unexpected Charm
What it is: Painting the vertical face of each stair step (the riser) in a solid color, gradient, pattern, or even with stenciled designs.
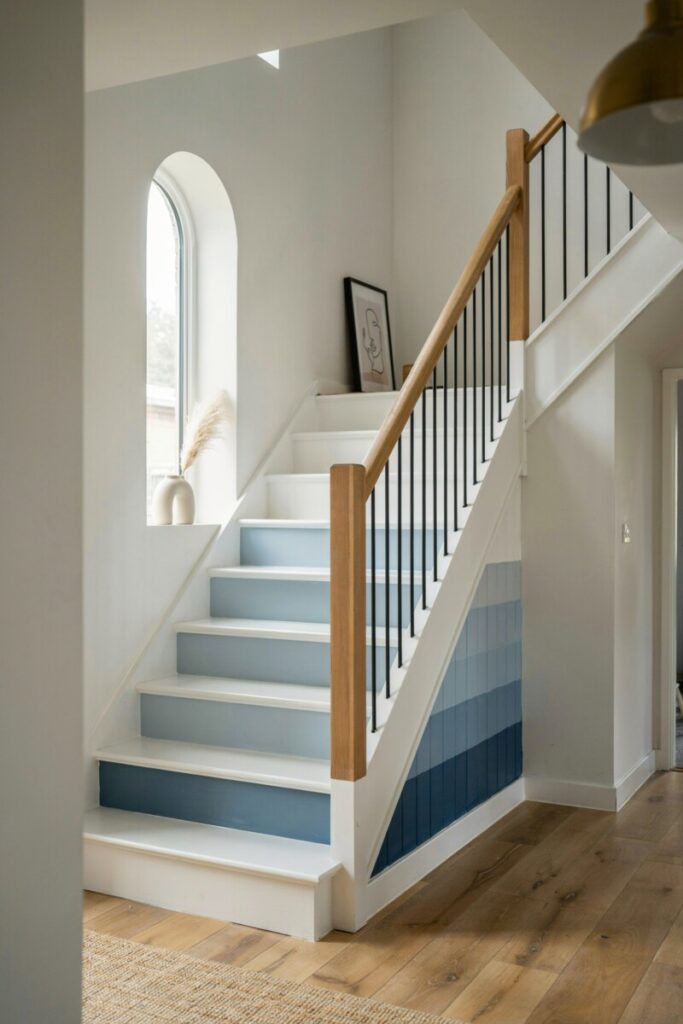
Why it works: Stair risers are often overlooked, which makes them a perfect canvas for a creative paint project. This adds personality to an otherwise utilitarian space and works beautifully in both traditional and contemporary homes.
How beginners can do it:
- Clean the risers thoroughly and sand lightly.
- Prime if the surface is stained or glossy.
- Paint each riser using an angled brush or small roller.
- For patterns or designs, use stencils or painter’s tape.
- Seal with a durable clear coat since stairs get heavy traffic.
Materials needed: Paint (satin or semi-gloss for durability), primer, sandpaper, brushes, painter’s tape, and a clear protective topcoat.
Design tips: Create an ombre effect by gradually lightening the color from top to bottom, or use alternating colors for a playful look. In a more formal home, stick to a single sophisticated color or a subtle tone-on-tone pattern. This is one of those weekend DIY projects that guests will absolutely notice and compliment.
9. Create a Faux Wallpaper Effect with Paint
What it is: Using techniques like sponging, ragging, combing, or color washing, you create textured, wallpaper-like patterns on your walls using only paint.
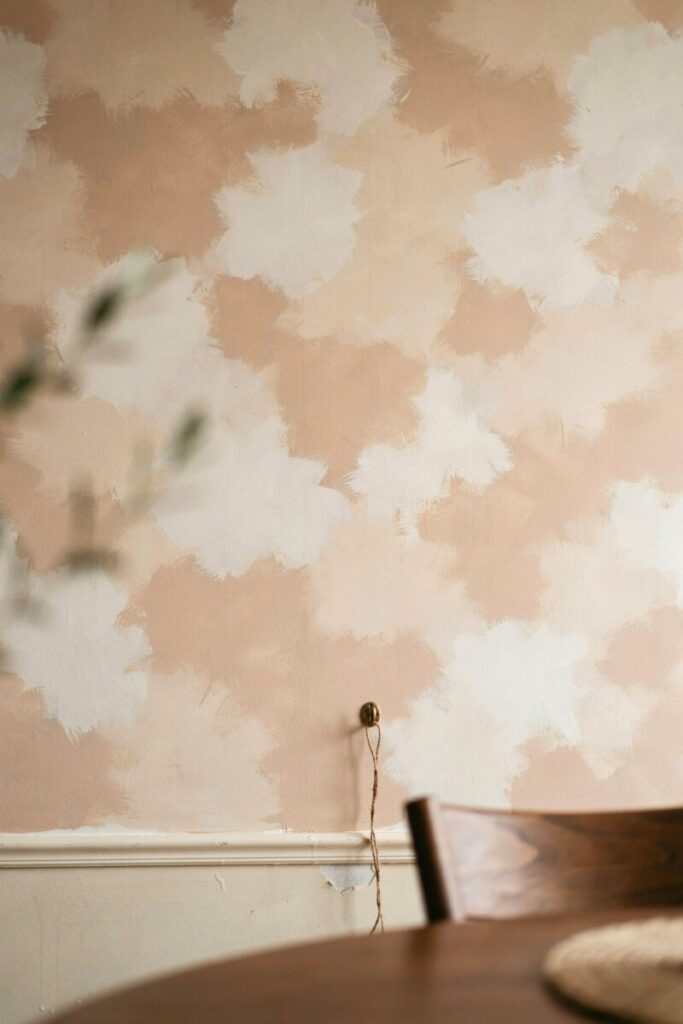
Why it works: Real wallpaper can be expensive, difficult to install, and nearly impossible to remove cleanly. A faux wallpaper effect gives you the same decorative impact with paint, making it one of the most renter-friendly interior painting ideas out there.
How beginners can do it:
- Start with a base coat in your main wall color and let it dry completely.
- Choose a technique — sponging is one of the easiest.
- Pour a small amount of your accent color into a tray.
- Lightly dab a sea sponge or natural sponge into the paint, then dab it onto the wall in random, overlapping patterns.
- Work in small sections and blend as you go.
Materials needed: Base coat paint, accent color paint, sea sponge or rag, paint tray, and gloves.
Design tips: Keep the contrast subtle for a sophisticated, old-world feel — think a slightly darker shade over a warm cream base. For more drama, use a metallic glaze over a deep base color. Practice your technique on a large piece of cardboard first to build confidence.
10. Paint Planters, Frames, and Decor Accents
What it is: Instead of buying expensive designer decor, you paint everyday items like terra cotta planters, wooden picture frames, vases, trays, or mirrors to match your interior style.
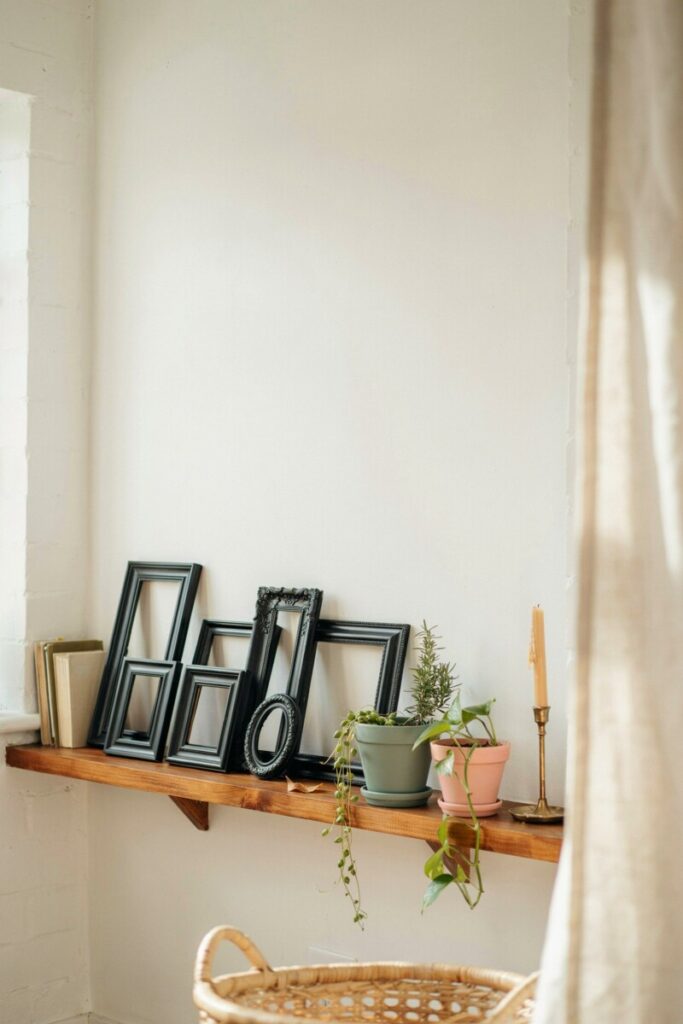
Why it works: Painted decor ideas let you customize even the smallest details of your home. It’s one of the most affordable home decor ideas available — you can transform a $2 thrift store frame into a $50-looking statement piece with nothing but paint and a steady hand.
How beginners can do it:
- Clean the item thoroughly and remove any dust or grease.
- Lightly sand glossy surfaces for better paint adhesion.
- Apply primer if needed (especially for plastic or metal surfaces).
- Paint using spray paint for an even, professional-looking finish, or use a brush for detailed items.
- Seal with a clear spray topcoat if the item will be handled frequently.
Materials needed: Spray paint or craft paint, primer, fine-grit sandpaper, brushes, and clear sealant.
Design tips: Matte black, brushed gold, and soft white are endlessly versatile accent colors. Try painting a set of mismatched thrifted frames all the same color for a cohesive gallery wall. Terra cotta planters painted in sage green, blush, or deep navy add instant style to any room.
Practical Tips for Paint DIY Success
Whether you’re tackling your first beginner painting project or your tenth, these foundational tips will help you achieve results that look polished and professional.
Best Paint Types for Each Project
- Interior walls: Flat or eggshell finish for living rooms and bedrooms; satin or semi-gloss for kitchens, bathrooms, and high-traffic areas.
- Furniture: Chalk paint (no prep needed), milk paint (vintage look), or specialty cabinet paint for durability.
- Cabinets: Acrylic-alkyd hybrid paints like Benjamin Moore Advance or Sherwin-Williams ProClassic.
- Decor items: Spray paint for smooth, even coverage on planters, frames, and small accessories.
- Floors and high-traffic surfaces: Epoxy or porch and floor paint rated for heavy use.
Essential Tools for Beginners
You don’t need a professional’s toolkit to get professional results. Here’s what every DIYer should have:
- High-quality angled brushes (2–2.5 inch) for cutting in and trim work
- A 9-inch roller with a 3/8-inch nap for walls
- Extension pole for reaching high areas
- Painter’s tape (FrogTape or 3M blue tape)
- Drop cloths (canvas is reusable; plastic is cheaper)
- Paint tray with disposable liners
- Sandpaper (120 and 220 grit)
- Tack cloth for dust removal
- Level and measuring tape
How to Prep Surfaces Properly
Prep work is where most beginners cut corners — and it’s where most projects fail. Always:
- Clean surfaces thoroughly (use TSP or a degreaser for kitchens)
- Fill holes and cracks with spackle, sand smooth
- Lightly sand glossy surfaces to help paint adhere
- Prime when painting over dark colors, stained surfaces, or when switching from oil-based to latex paint
- Protect floors, furniture, and fixtures with drop cloths and tape
How to Choose the Right Colors
- Test before committing: Buy sample pots and paint large swatches on the wall. Observe how the color changes in different lighting throughout the day.
- Use the 60-30-10 rule: 60% dominant color (walls), 30% secondary color (furniture, curtains), 10% accent color (pillows, art, painted decor).
- Consider the room’s function: Calming blues and greens for bedrooms, energizing yellows and corals for kitchens, focused neutrals for home offices.
- Don’t forget undertones: Colors have warm (red, yellow, orange) or cool (blue, green, purple) undertones. Mixing undertones can look off, so try to keep them consistent within a room.
Common Mistakes to Avoid
- Skipping primer
- Overloading your brush or roller (thin coats are better than thick, drippy ones)
- Removing painter’s tape after the paint has fully dried (it can peel the paint with it)
- Painting in direct sunlight or extreme temperatures
- Rushing between coats — always follow the manufacturer’s recommended dry time
How to Make Your Results Look Professional
- Invest in quality paint — it covers better, lasts longer, and requires fewer coats.
- Use high-density foam rollers for furniture and a short-nap roller for smooth wall finishes.
- Maintain a “wet edge” when painting walls to avoid visible lap marks.
- Apply paint in a “W” or “N” pattern, then fill in for even coverage.
- Take your time with prep — crisp tape lines and smooth surfaces make all the difference.
Frequently Asked Questions
What paint DIYs are easiest for beginners?
The easiest paint DIY ideas for beginners include painting an accent wall, painting a door or trim, and painting small decor items like planters or frames. These projects require minimal prep, few tools, and deliver quick, satisfying results without complex techniques.
How can I transform a room cheaply with paint?
Focus on high-impact, low-cost projects like painting a single accent wall, color-blocking a section of wall, or painting furniture you already own. Even painting your door frames or baseboards a contrasting color can completely change a room’s feel. Paint is consistently ranked as the number one budget home makeover tool for a reason.
What are the best paint ideas for small spaces?
For a small space makeover, consider a painted headboard illusion, vertical color blocking to draw the eye upward, or painting trim and doors in a single color to create a seamless, expansive feel. Light colors generally make small rooms feel larger, but a single dark, moody wall can also create a cozy, jewel-box effect.
Do I need special tools for simple paint DIYs?
For most easy paint DIYs, you don’t need anything beyond standard painting supplies: brushes, a roller, painter’s tape, a drop cloth, and a tray. Specialty projects like stenciling or faux finishes may require additional tools like stencils, sponges, or glazes, but these are inexpensive and widely available at any hardware or craft store.
Ready to Transform Your Space This Weekend?
Paint is hands-down one of the most powerful, affordable, and accessible tools in your home improvement arsenal. Whether you’re craving a subtle refresh or a bold new look, these 10 easy paint DIYs prove that you don’t need a huge budget, professional skills, or a complete renovation to transform your space.
From a dramatic accent wall to painted planters on your windowsill, every project on this list is designed to deliver big results with minimal effort. The best part? Most of these room refresh ideas can be completed in a single weekend — sometimes even in just a few hours.
So pick the project that speaks to you, gather your supplies, and get painting. Your home — and your wallet — will thank you. And once you see the difference a little paint can make, you might just find yourself planning your next DIY room makeover before the first one is even dry.